Import Jobs at the Custodian Level
You can import multiple Discovery Jobs and add them to a Custodian through a CSV or comma-delimited file. Data Extract Job(s) and/or Processing Job(s) may be optionally created at the same time.
To import Discovery Jobs, the CSV or comma-delimited file should contain the Container Path column header. Container Name is optional unless only Container Path(s) are specified, then the Container Name header is required.
There are several different scenarios for importing Jobs at the Custodian level. You can:
-
Import Jobs with all columns specified in the import file (Job Name, Container Name, and Container Path). In this scenario, Jobs are created while focus remains on the selected Custodian. The CSV or comma-delimited file contains the columns Job Name, Container Name, and Container Path (required).
-
Import Jobs with just the Container Path(s) and Container Name(s) specified in the import file. In this scenario, a Job Name is required for each selected Container. The Job Name can be added to the CSV or comma-delimited file, manually entered in the Import Preview dialog box before importing or left blank (name will be auto-set).
-
Import Jobs with only the Container Path(s) specified in the import file. In this scenario, a Job name and a Container Name is required for each selected Container. The Job name and the Container Name can be added to the CSV or comma-delimited file, manually entered in the Import Preview dialog prior to importing, or left blank (name will be auto-set).
-
Import Jobs/Containers and create Data Extract Job(s) and/or Processing Job(s) under the Custodian.
-
In the Client Management Tree View, select the Custodian under the appropriate Case (Project).
-
Click
 . The Open CSV file for Import
dialog box appears.
. The Open CSV file for Import
dialog box appears. -
Navigate to the CSV or comma-delimited file.
-
Click Open. The Import Preview dialog box appears.
The Import Preview dialog box contains the following column headers:
-
Job Name - Indicates the new Discovery Job name
-
Data Extract - Blank by default; no Data Extract Job will be created until you click the drop-down menu arrow and select Yes.
-
Processing - Blank by default; no Processing Job will be created until you click the drop-down menu arrow and select Yes.
-
Container Name - Required only if Container Path(s) are specified in the import file.
-
Container Path - Specified in the imported CSV or comma-delimited file.

Note: If the Container Path is modified, it must exist before importing as well as be accessible from the eCapture Controller.
The Import Preview dialog box is populated based on the contents of the CSV or comma-delimited file that you are preparing to import.
If necessary, the data may be edited directly in the Import Preview dialog box before importing.
-
-
Click Select All to select all the Jobs and/or Containers. The Select All changes to Deselect All to allow clearing all the Jobs and/or Containers in one action if necessary.
- Enter a Discovery Job Name for the Custodian in the Job Name column.
-
Enter a Container Name for each Container.
Note: If a Discovery Job and/or Container Name is not specified (fields are left blank), the system returns a prompt to indicate it will use the folder name of the associated Container.
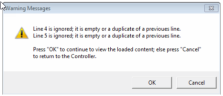
Click Cancel and enter a Job Name and a Container Name in the blank fields. Otherwise, accept the default names indicated by the Warning Messages dialog box.
- To create Data Extract Jobs and/or Processing Jobs, for all Jobs indicated in the Import Preview dialog box, click the option Create All Data Extract and/or Create All Processing. The Data Extract column and/or the Processing column changes from blank to Yes. These columns cannot be edited.
-
Click OK.
The Imported Job Creation dialog box displays to indicate the number of Discovery Jobs, Data Extract Jobs, and Processing Jobs created.
The newly created Jobs display in the Job Queue pane of the eCapture Controller as well as in the Client Management Tree View for the selected Custodian indicated in the Import Preview dialog box.
The Data Extract and Processing Jobs use the name of the Discovery Job. If necessary, rename the Jobs before starting.
The Containers tab shows the Container Name, Jobs, and the Container Path.
-
Start the Jobs in the Job Queue pane.

Related Topics
Export Custodians and Containers for the Case (Project)
Export Jobs and Containers for the Custodian